Pivotal Cloud Foundry on Azure - the Easy Way

Hi there! I’m Oded.
I work for VMware Tanzu as a Senior Lead Solutions Engineer, spreading the message of cloud native development, cloud native platforms on Kubernetes and app transformation.
I helped design large-scale, cloud-native solutions using the microservices architecture running on Pivotal Cloud Foundry and Kubernetes, using Spring Boot and Spring Cloud.
I’m highly skilled in Kubernetes, Java, Spring Boot, Spring Cloud, Apache Kafka, Event Sourcing and DevOps practices.
I enjoy photography, video editing, and the music of the King of Pop.
In this tutorial I'll show you the fastest way to get an evaluation of Pivotal Cloud Foundry up and running.
If you want get a deeper understanding of how the Pivotal Cloud Foundry installation works, including the use of BOSH, Ops Manager and the networking you need to setup, have a look at PCF on Azure - the Hard Way.
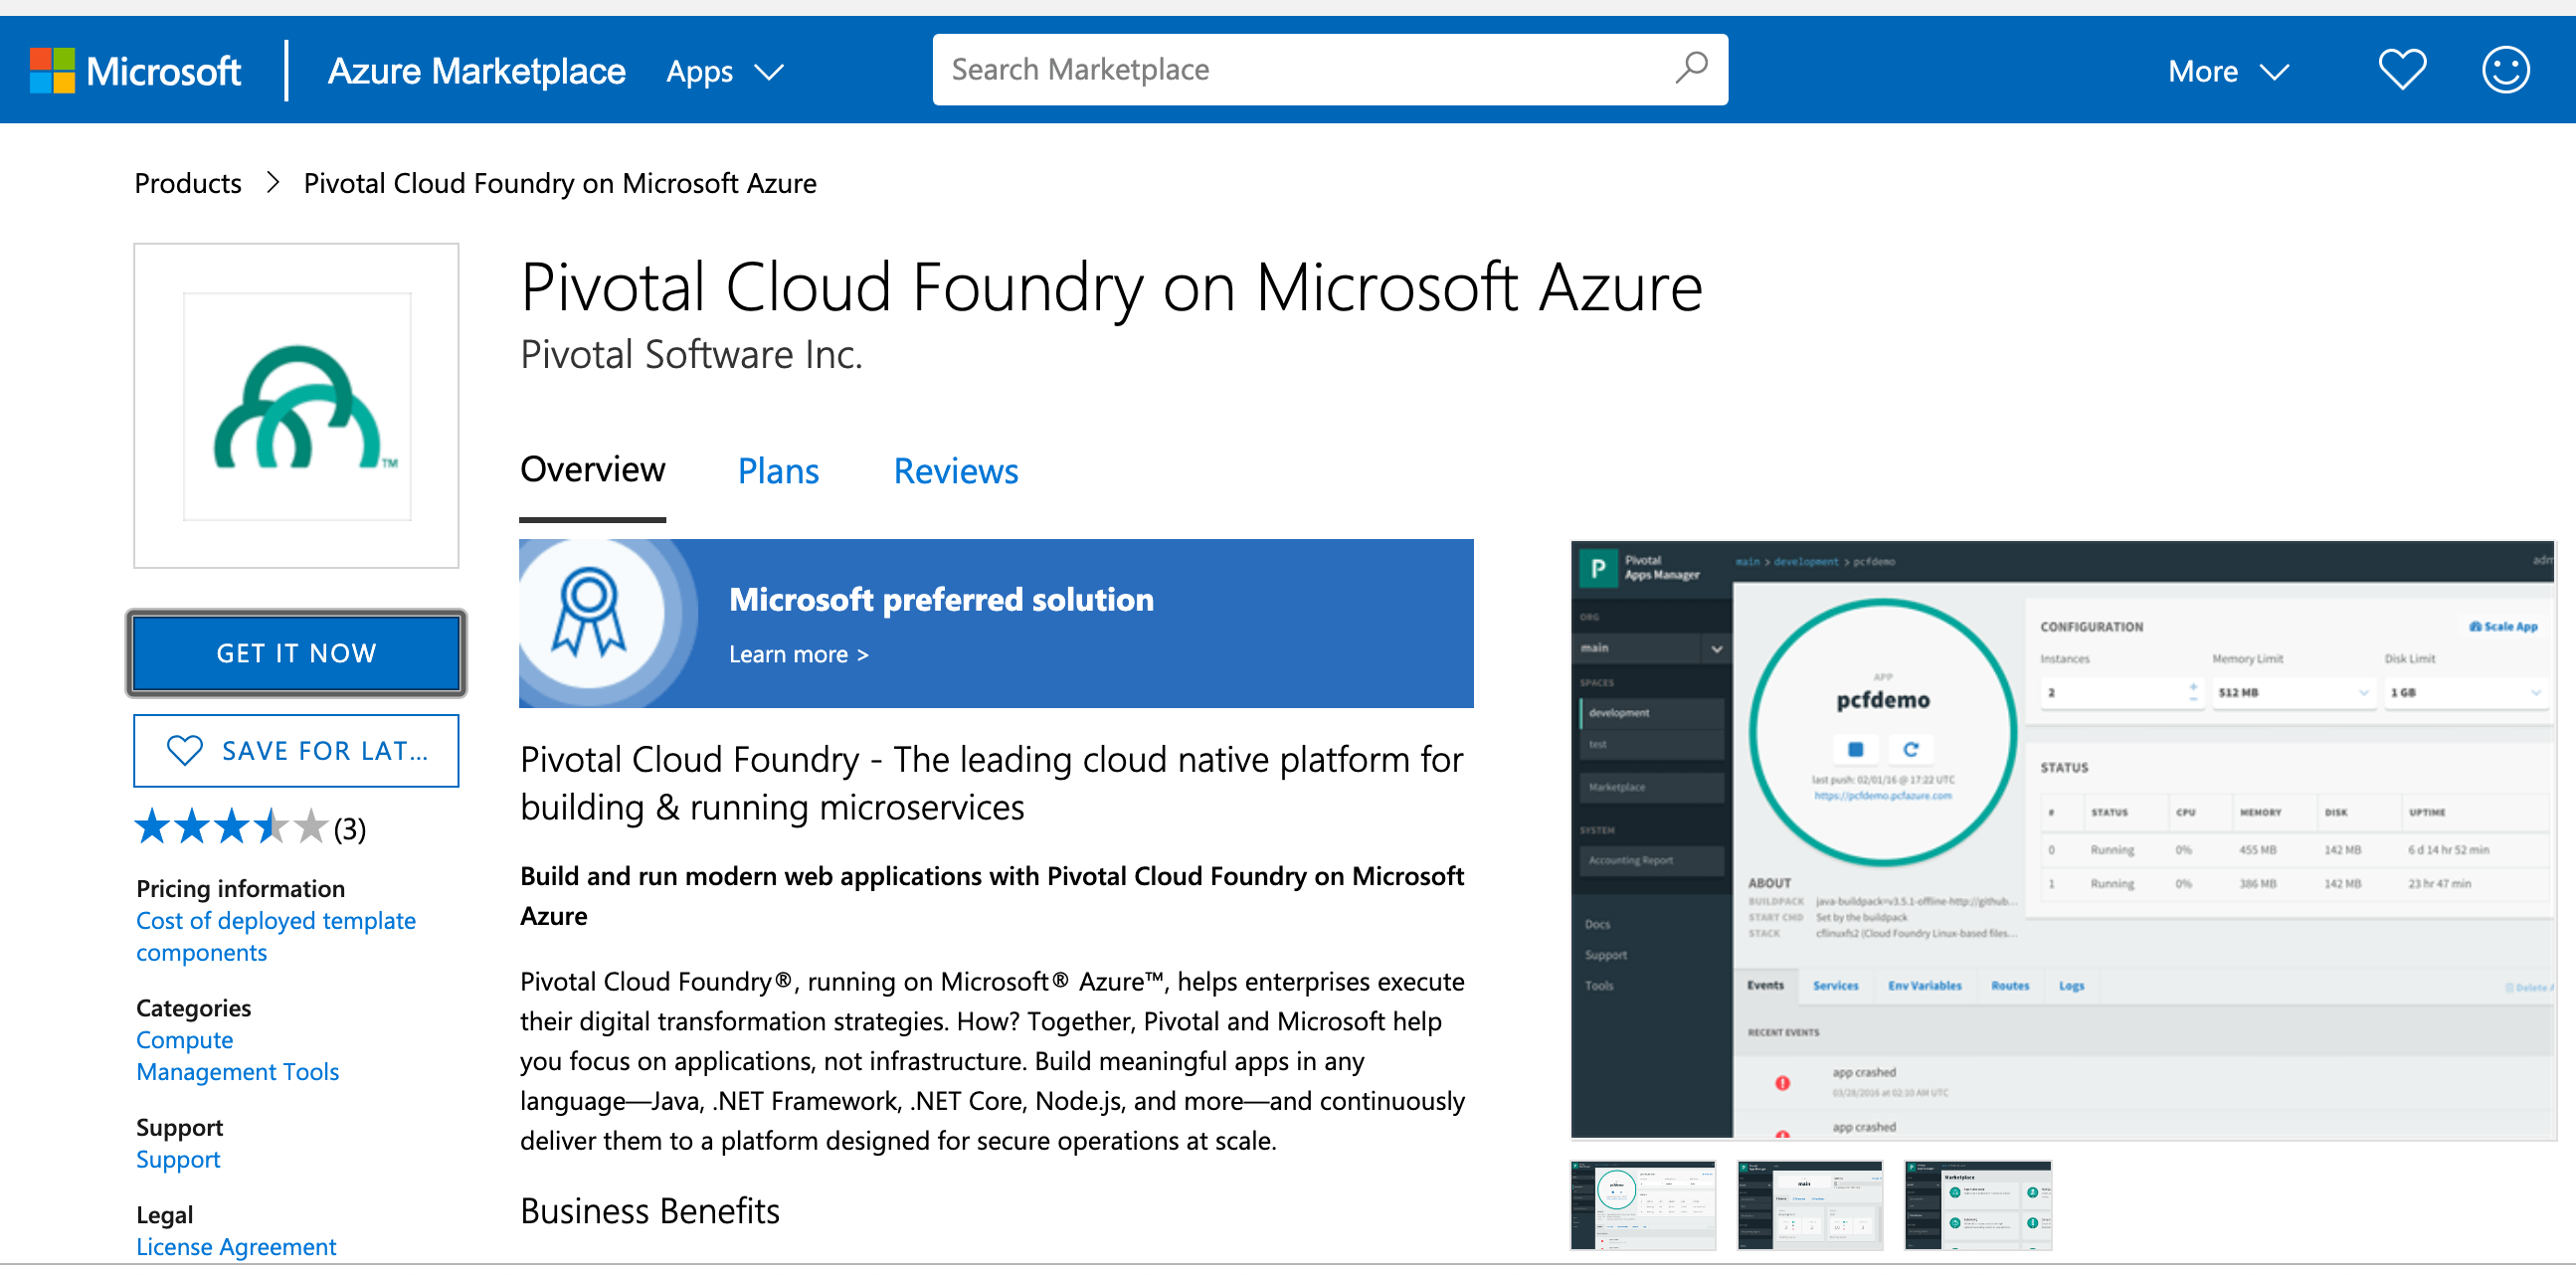
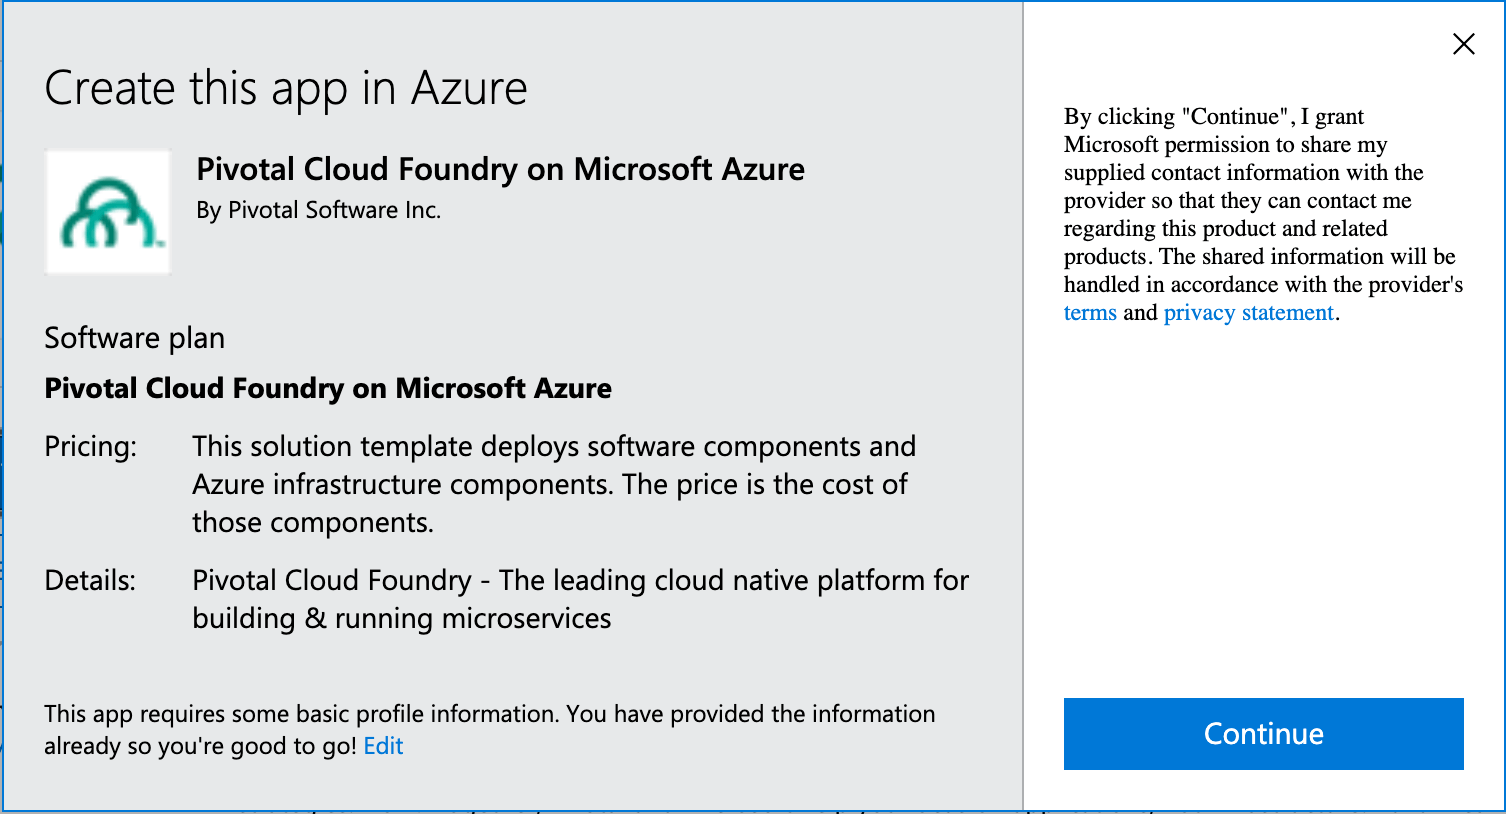
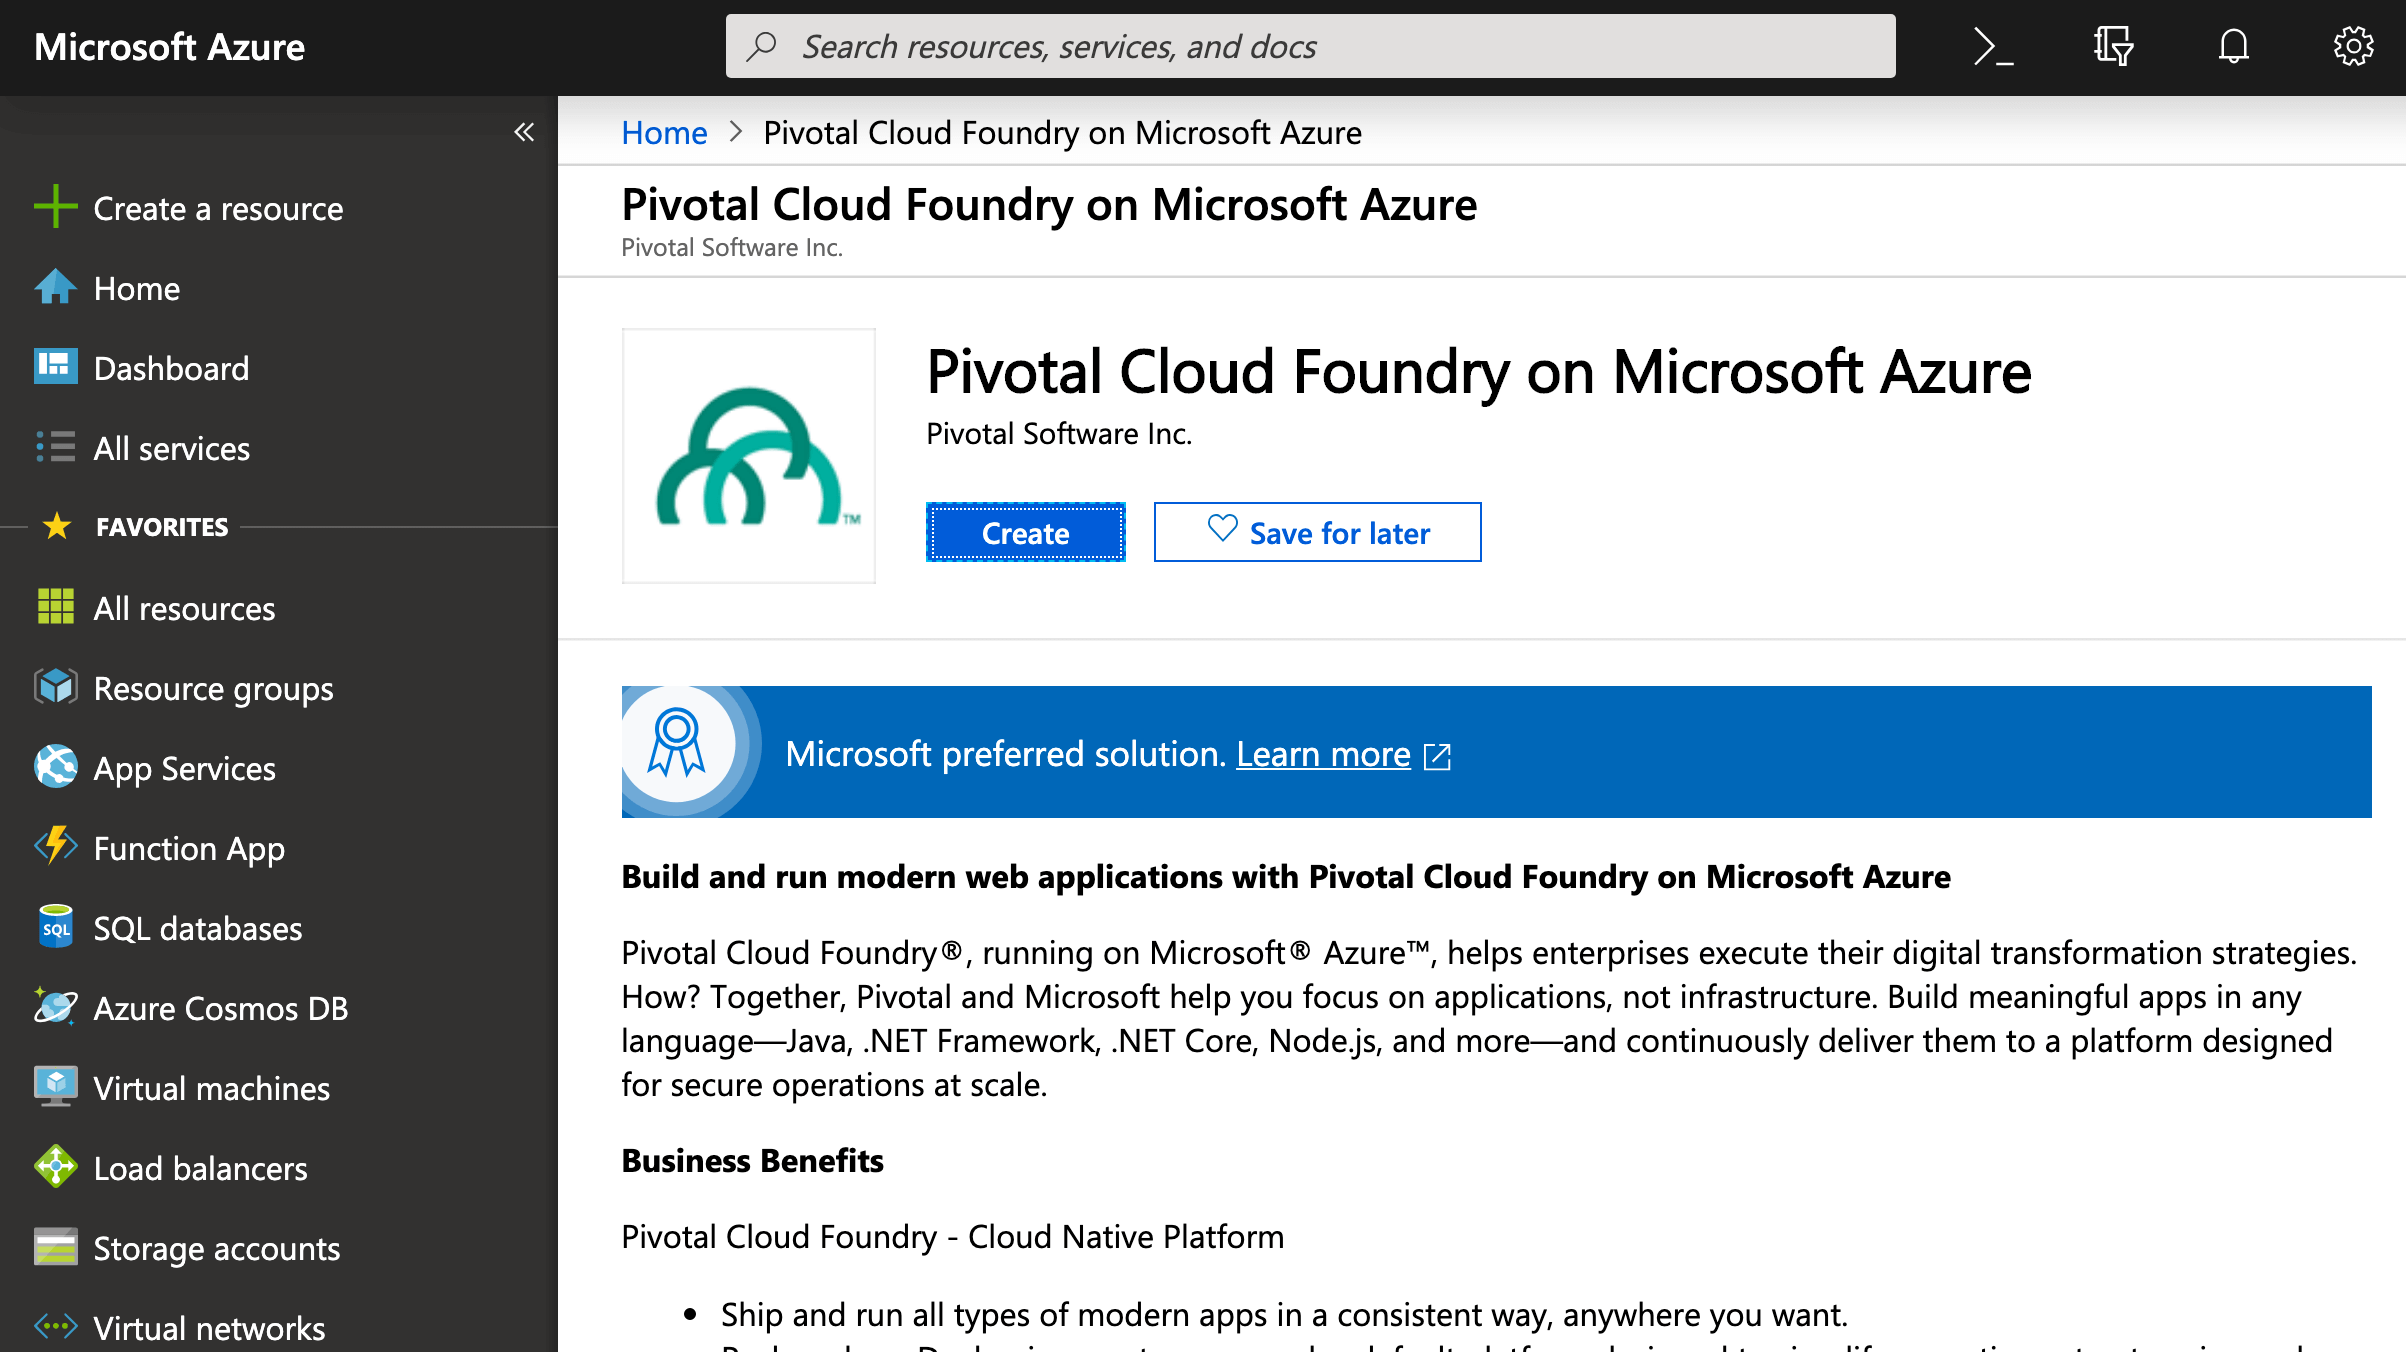
Go to the Pivotal Cloud Foundry on Microsoft Azure page and click Get it now followed by Continue and then Create:
 p>
p>
You need to provide 5 parameters for the installation:

Run the following command on a linux machine:
mkdir ~/certs
ssh-keygen -t rsa -b 2048 -f ~/certs/pcf-on-azure -P ""
Copy the contents of ~/certs/pcf-on-azure.pub to the field SSH public key. Keep the file ~/certs/pcf-on-azure in a secured place for future reference.
You will need a Service Principal JSON file for the Service Principal field. The fields in the JSON are as follows:
{
  "subscriptionID": "SUBSCRIPTION-ID",
  "tenantID": "TENANT-ID",
  "clientID": "SERVICE-PRINCIPAL-NAME",
  "clientSecret": "SERVICE-PRINCIPAL-PASSWORD"
}
If you don't have it yet, install the Azure CLI from https://docs.microsoft.com/en-us/cli/azure/install-azure-cli?view=azure-cli-latest
Login with the az cli:
az login
Confirm the login in the pop-up web page. Once done you will see a list fo accounts in the command prompt.
Review the list of accounts by running:
az account list
Important: If you have multiple accounts, make sure you set the default to the account you want to use for the installation! The default account is marked as isDefault . You can change it using:
az account set -s <id-field-from-response-json>
You now have two out of the four required fields:
- The
idfromaz account listis thesubscriptionID. Don't ask me why, I'm sure Microsoft had a good reason :) - The
tenantIdfromaz account listis thetenantIDfield. Make sure that in the latter it isID, notId.
We now need to create a service principal for the installation.
First, save some environment variables for later use:
CLIENT_SECRET=<choose a secure secret>
USER_ID=<choose a application user id, for example Oded>
SUBSCRIPTION_ID=<id field from response json above while running az account list>
TENANT_ID=<tenantId field from response json above while running az account list>
Important: Choose a CLIENT_SECRET that is at least 40 characters long and contains alphanumeric characters, digits and at least one underscore. Otherwise the deployment will later fail on password validation.
Now, create an active directory application:
az ad app create \
--display-name "Service Principal for BOSH" \
--password $CLIENT_SECRET \
--homepage "http://BOSHAzureCPI" \
--identifier-uris "http://${USER_ID}BOSHAzureCPI"
(Tip: if you ever need to delete the AAD use this:
az ad app delete --id "http://${USER_ID}BOSHAzureCPI")
Create a service principal from the AAD:
az ad sp create --id `az ad app show --id http://${USER_ID}BOSHAzureCPI | jq -r .appId`
Wait for about 30 seconds for Azure active directory updates to progapate, then add the contributor role:
az role assignment create --assignee http://${USER_ID}BOSHAzureCPI --role "Contributor" --scope /subscriptions/${SUBSCRIPTION_ID}
Login with the Application user:
az login \
--username `az ad app show --id http://${USER_ID}BOSHAzureCPI | jq -r .appId` \
--password $CLIENT_SECRET \
--service-principal \
--tenant ${TENANT_ID}
Enable compute, netowrk and storage access:
az provider register --namespace Microsoft.Storage
az provider register --namespace Microsoft.Network
az provider register --namespace Microsoft.Compute
Logout of the application user and login again to your regular azure account:
az logout
az login
You now have the two remaining fields:
- The ClientID can be extracted by running
az ad app show --id http://${USER_ID}BOSHAzureCPI | jq -r .appId - The ClientSecret is the value of $CLIENT_SECRET you set above.
A final JSON might look like this:
{
  "subscriptionID": "24A7CC81-402C-44EB-8DFE-96A8DB670E37",
  "tenantID": "BF7500C3-A3D4-411F-AA5B-606CBE903FC4",
  "clientID": "23536697-C5F6-49DD-9E2F-68D36FFDCA22",
  "clientSecret": "My-Super-Secret-Secret"
}
Save this file as azure-creds.json, then upload it to the web page under the Service Principal field.
Under "Resource group", choose "Create new" and name the resource group "pcf".
Choose a Location you want to deploy to.
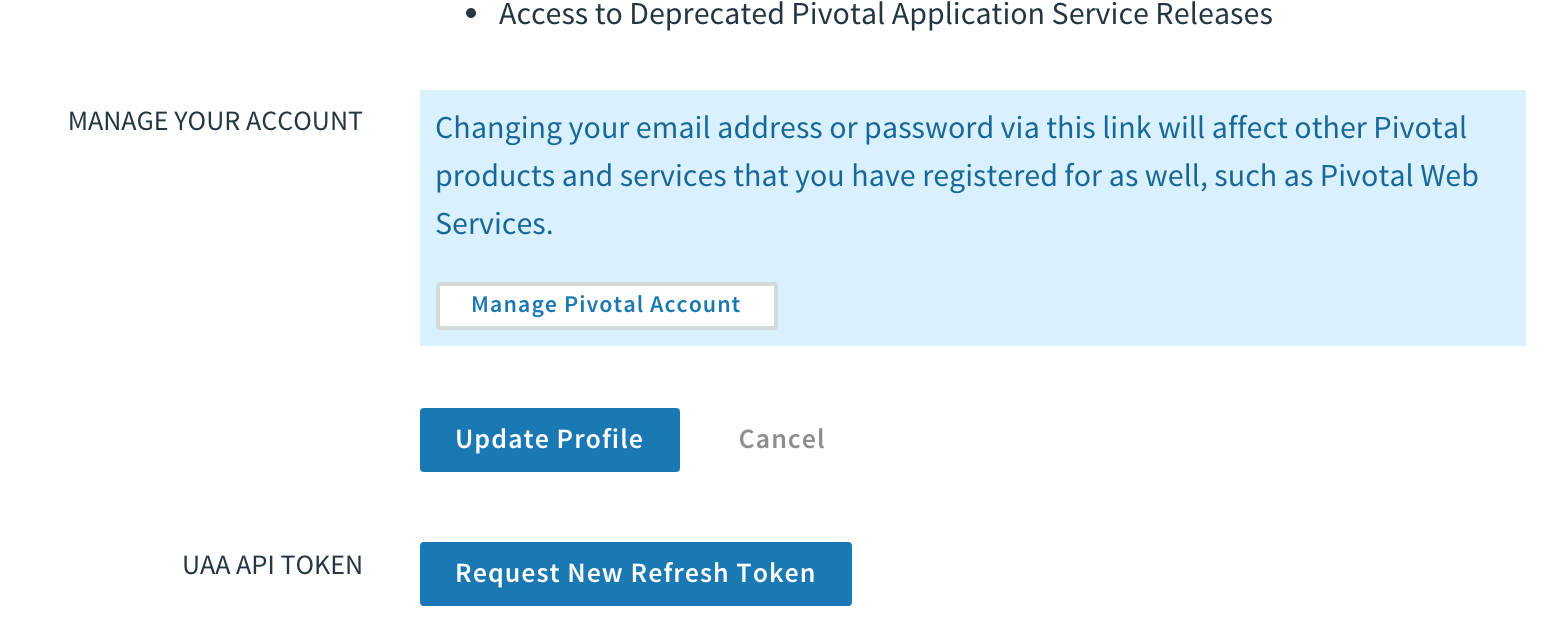
Until Pivotal Network Token, enter your Pivotal Network token from Pivnet at network.pivotal.io. You can find (once logged in) under your User Name --> Edit Profiles --> Request New Refresh Token. It's best to keep this token in a secured place like LastPass and not recreate it every time you need to.
Before continuing, make sure you accepted the EULAs for the links below at Pivnet. In each of the following links, you will be prompted to accept an End-User License Agreement. Once you accepted the EULA, a download will begin, but you can immediatly cancel it. You account is now linked to accepting the EULA and so the installation from Azure can download the files.
https://network.pivotal.io/products/ops-manager/ (Choose
latest 2.4 version and then download Pivotal Cloud Foundry Ops Manager YAML for Azure. Do the same for the latest 2.5 version)
https://network.pivotal.io/products/elastic-runtime/ (Choose latest 2.4 version and then download Small Footprint PAS. Do the same for the latest 2.5)
https://network.pivotal.io/products/azure-service-broker/ (Choose latest version and then download Microsoft Azure Service Broker)
You now have all required data for installation:
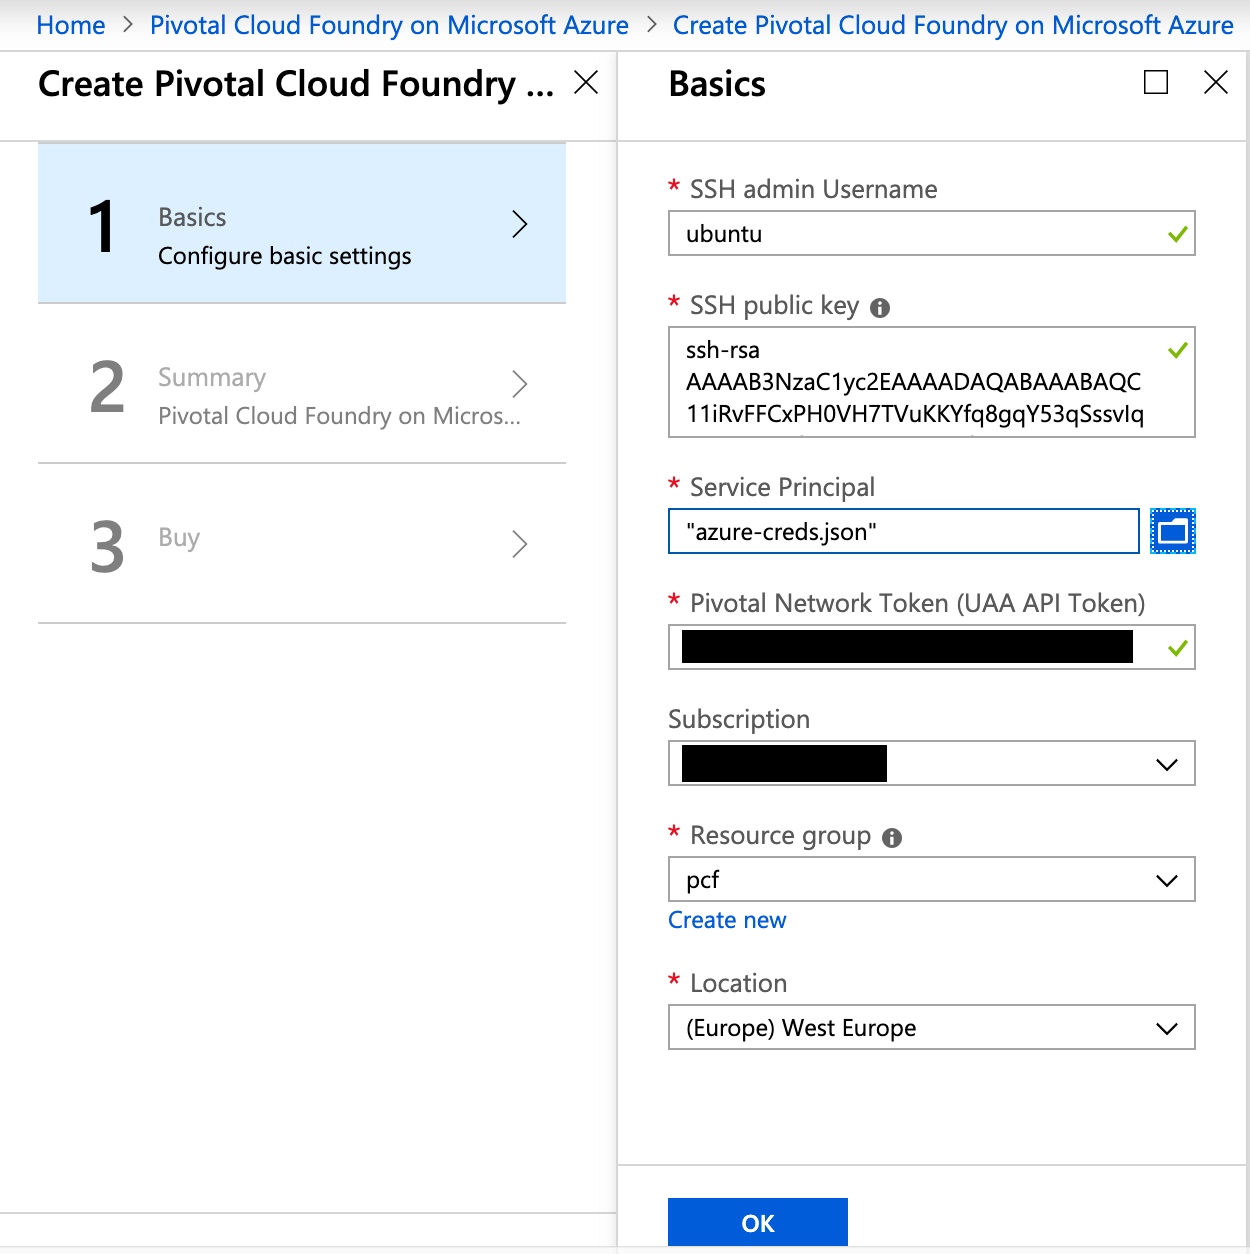
Click "OK". In the next page, wait for the validation to complete and click "OK" again. In the last screen, click "Create".
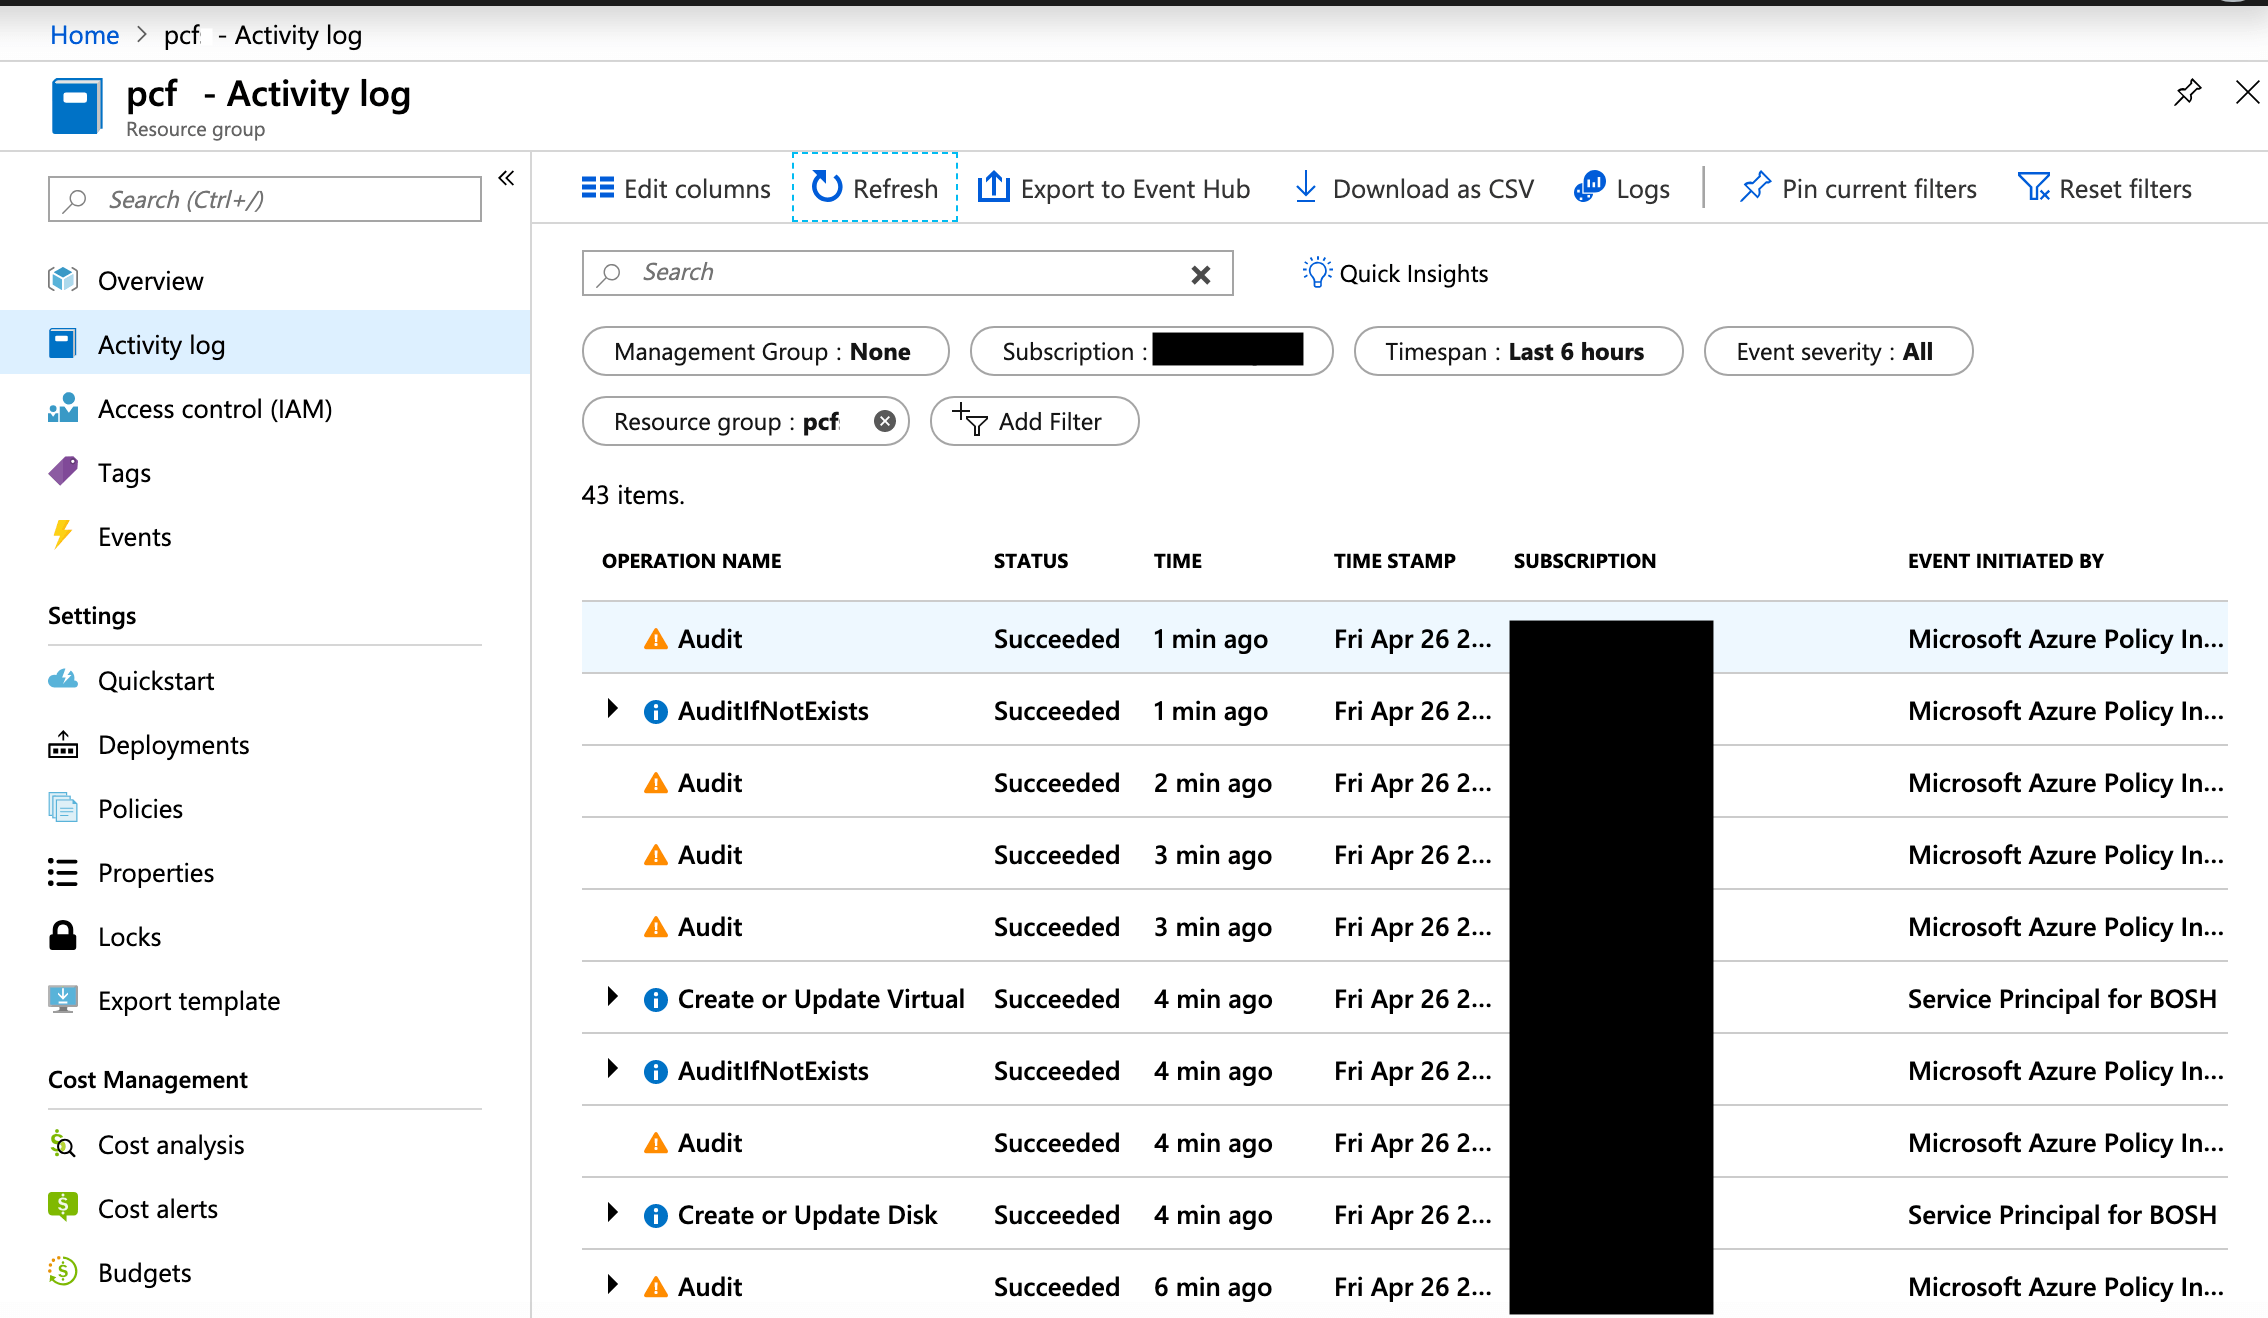
Your deployment will now begin. You can track the progress under Resource Groups --> pcf --> Deployments. You will receive a notification in the Azure portal when the Deployment was successful, however note that there are additional installations done after the deployment is complete.
When the deployment is done, click on the deployment pivotal.pivotal-cloud-foundry-.... and then Outputs. You will see the login URL and password for Ops Manager:
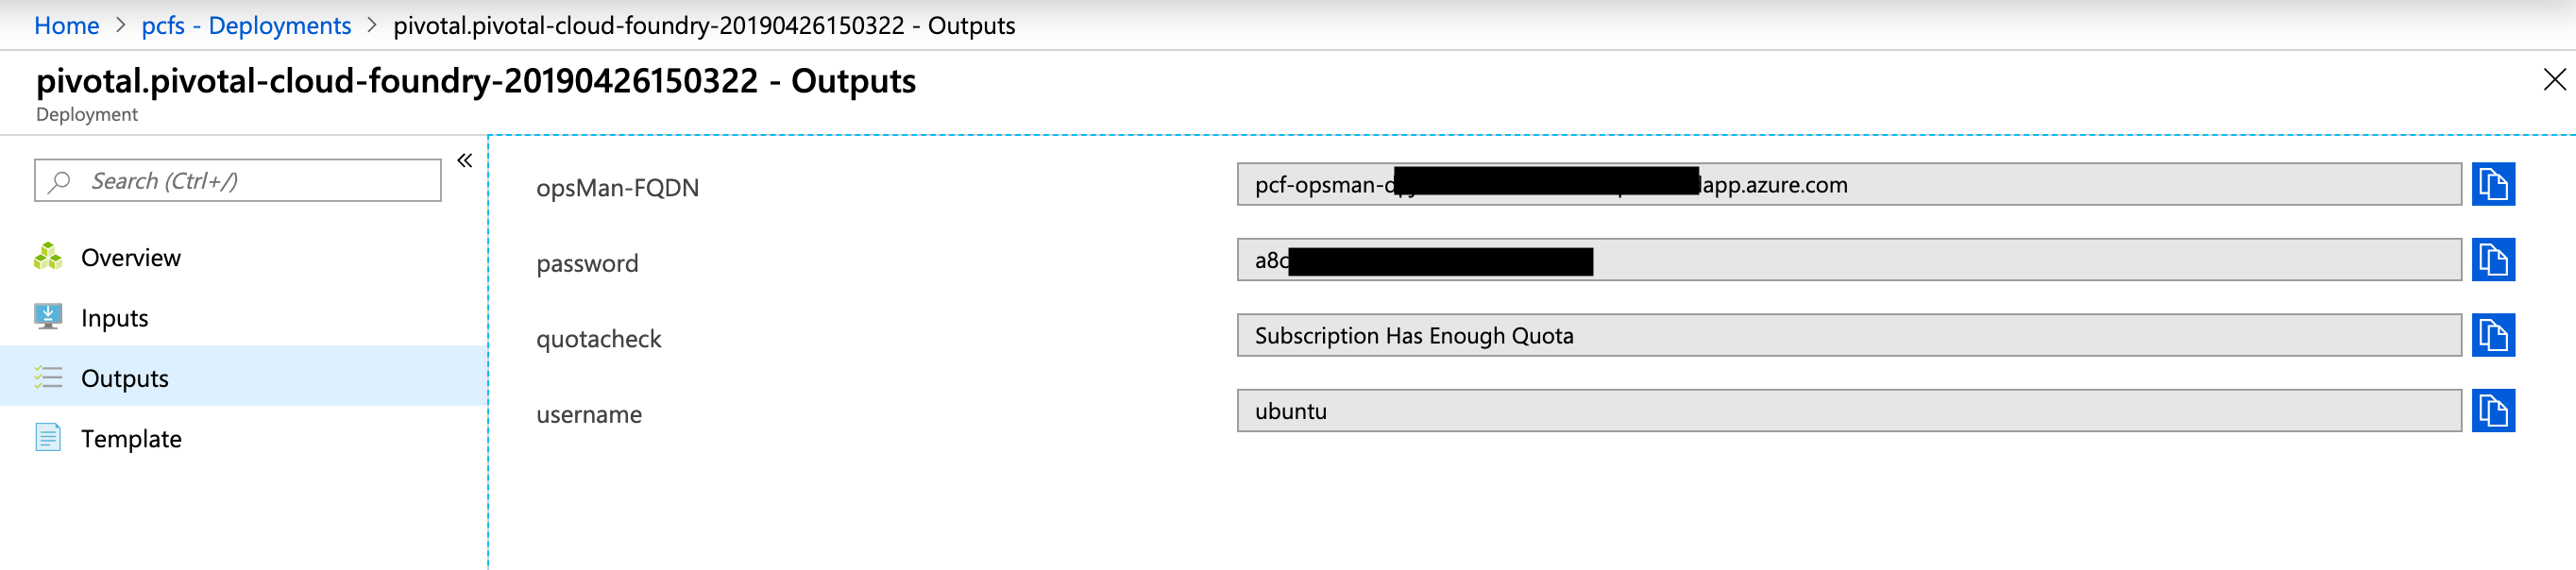
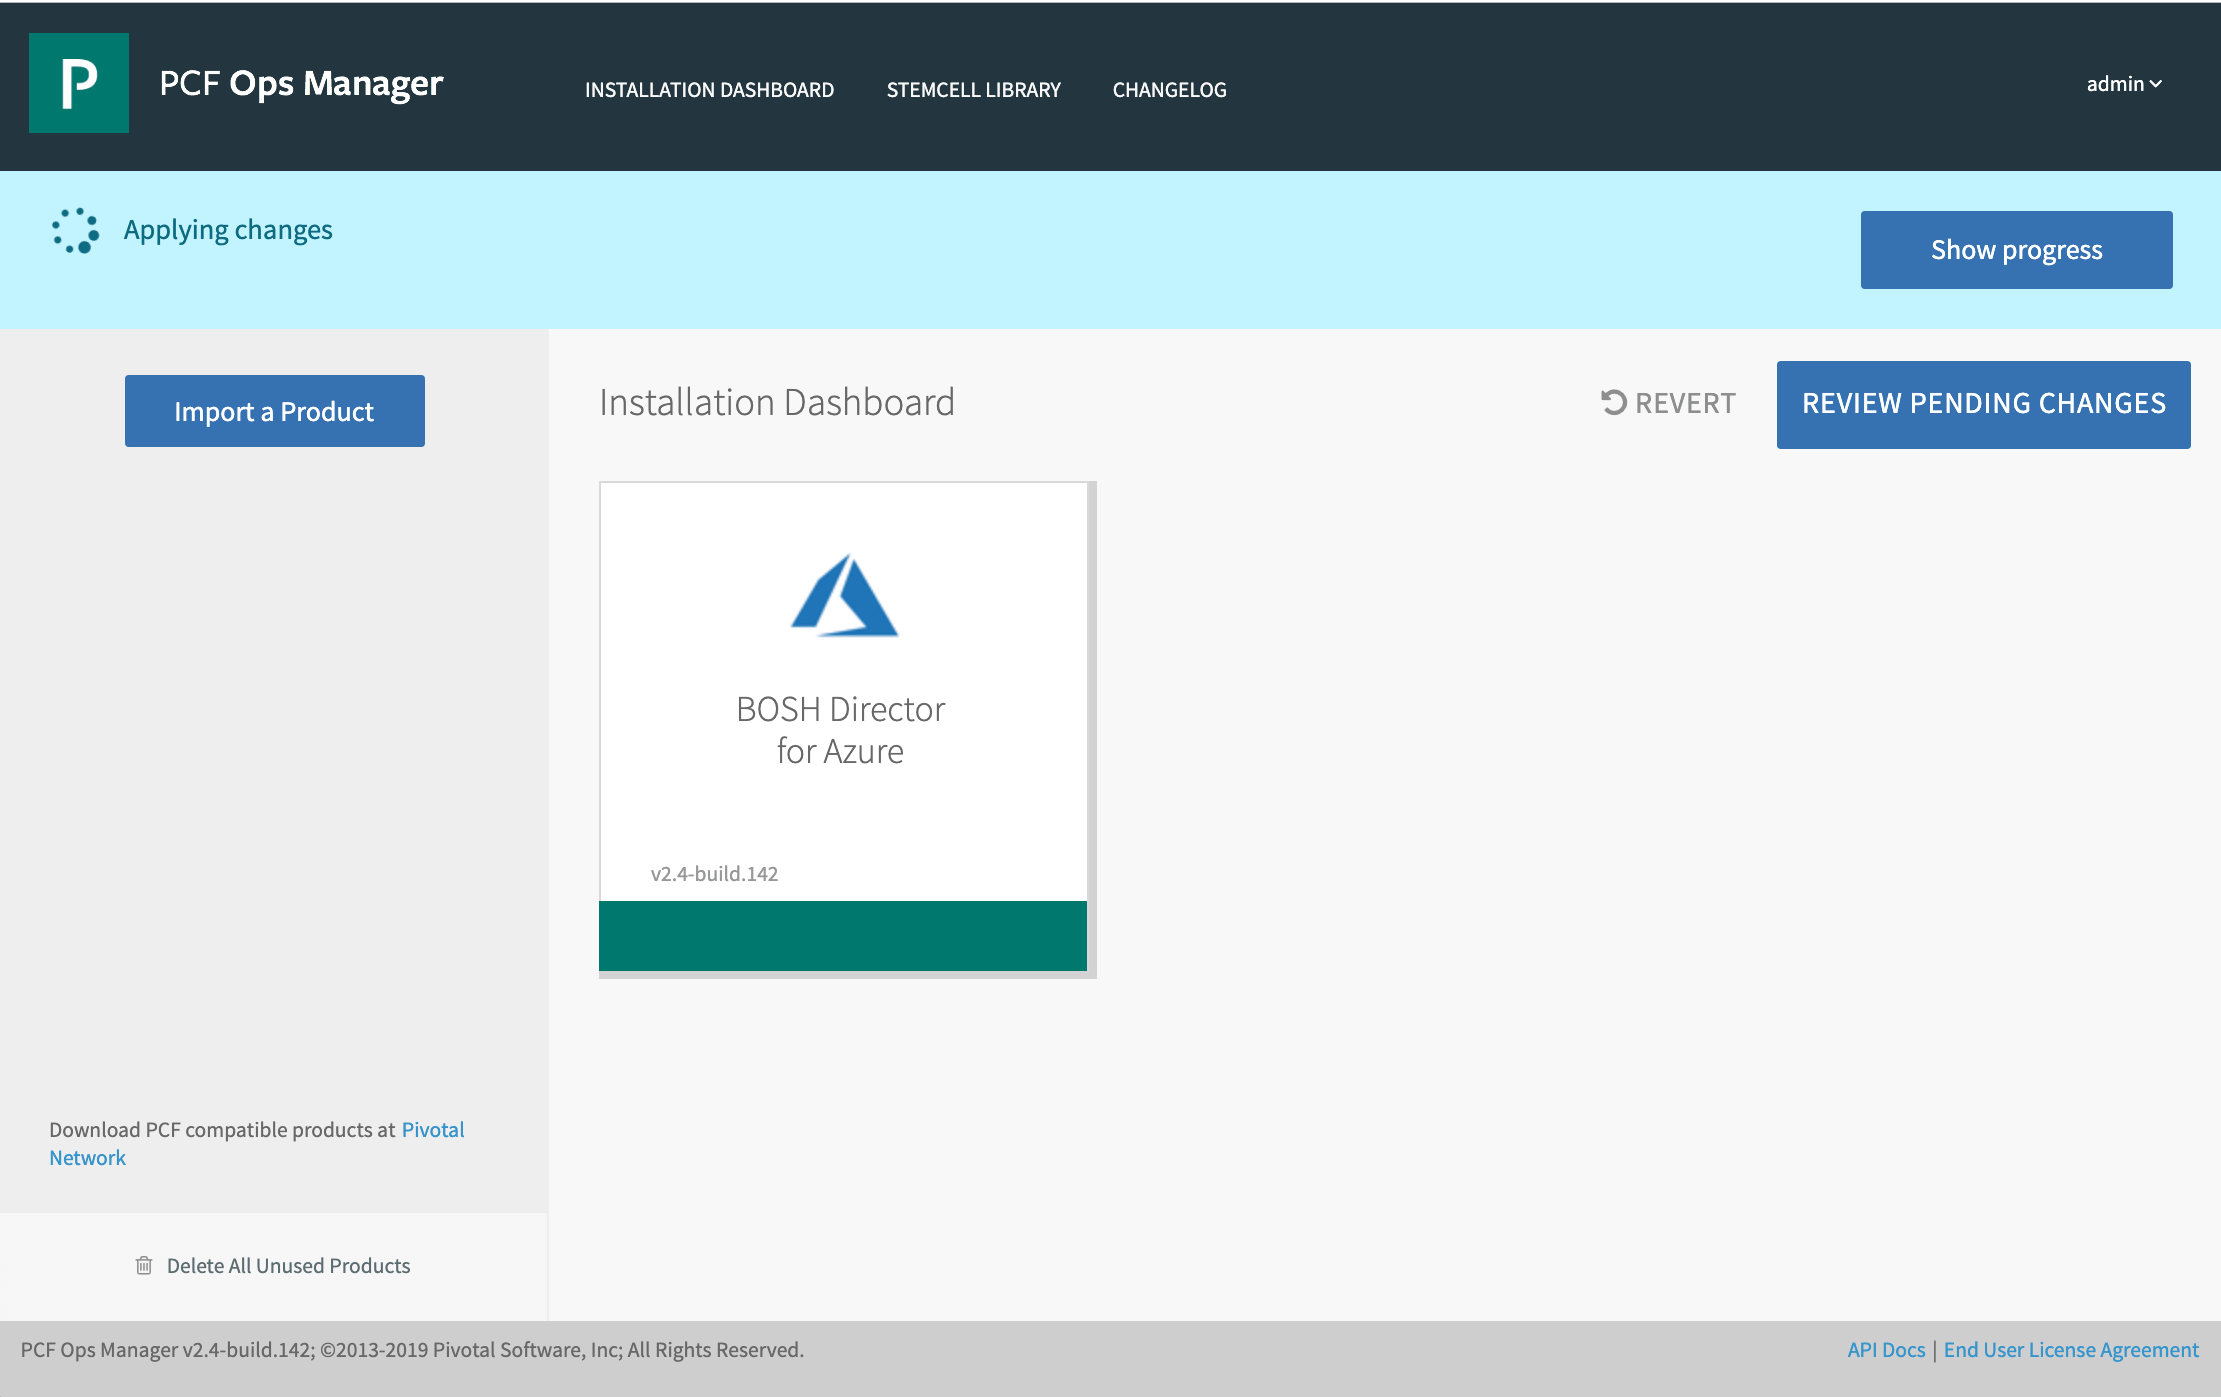
Go to the URL listed under opsMan-FQDN. The username is admin and the password is located under Outputs-->password.
You can now track the progress of the installation in Ops Manager.
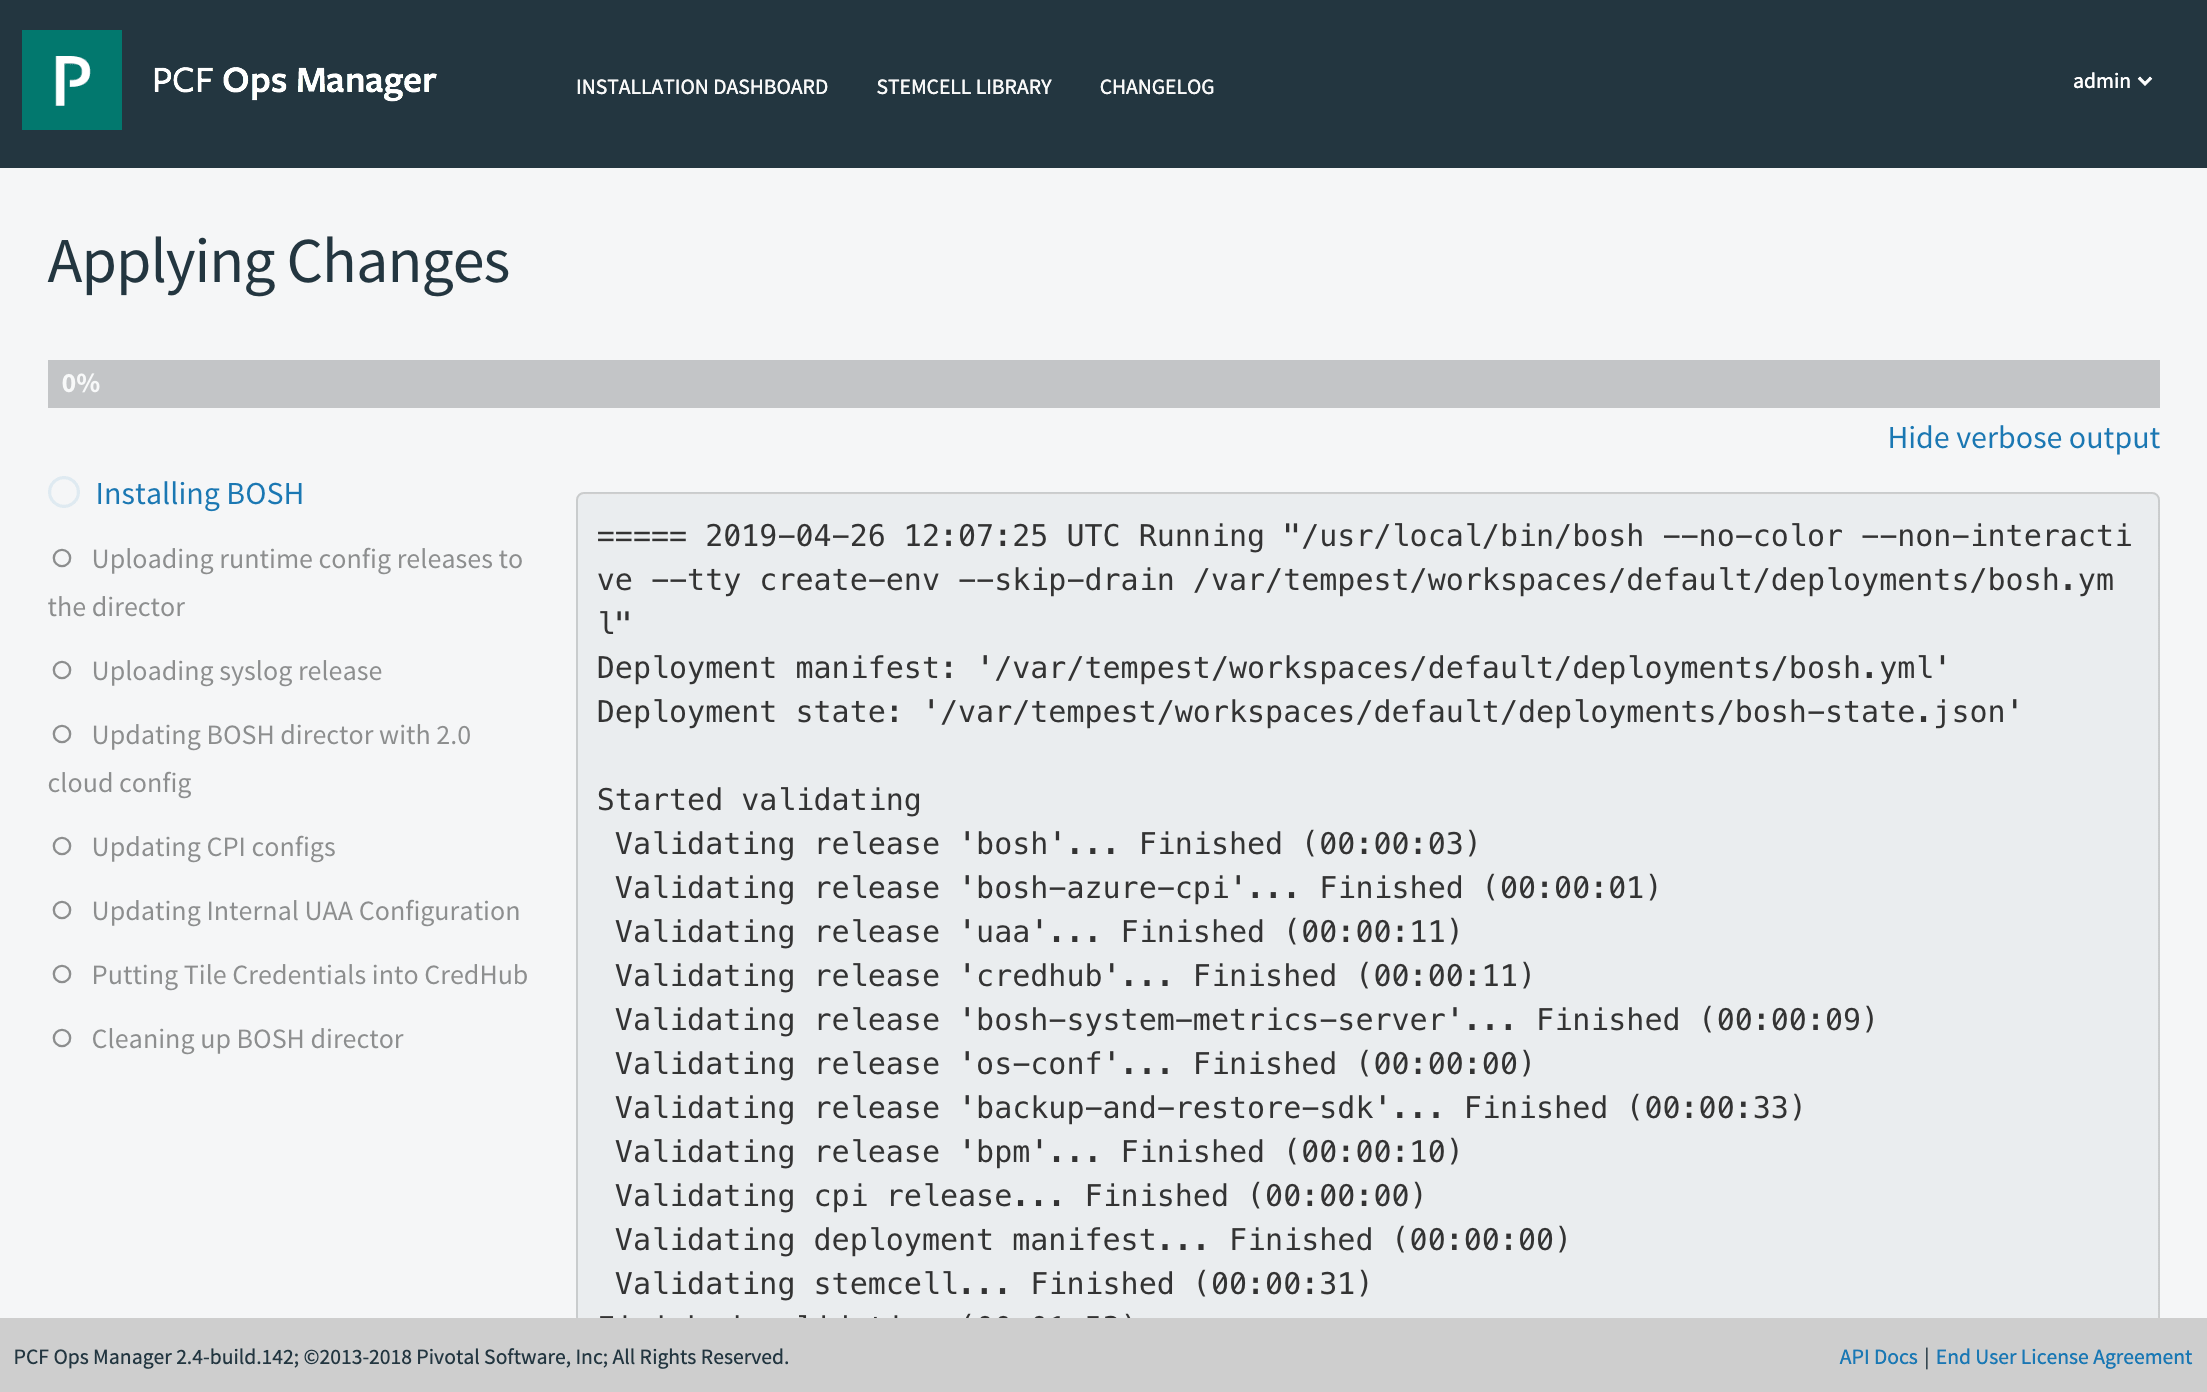
When the BOSH Direcor installation completes, it might take up to 1/2 an hour for the PAS installation to continue. You can track the progress under Resource Group --> Activity Log.